Follow Me On Social Media!
Craving a zesty kick in your pickled veggies? Look no further than these mouthwatering Spicy Dilly Beans! Preserving summer’s freshness in a jar has never been more satisfying. The aromatic blend of dill seed, garlic, and red chile flakes infuses each bean with a burst of flavor, making them an irresistible addition to your pantry.
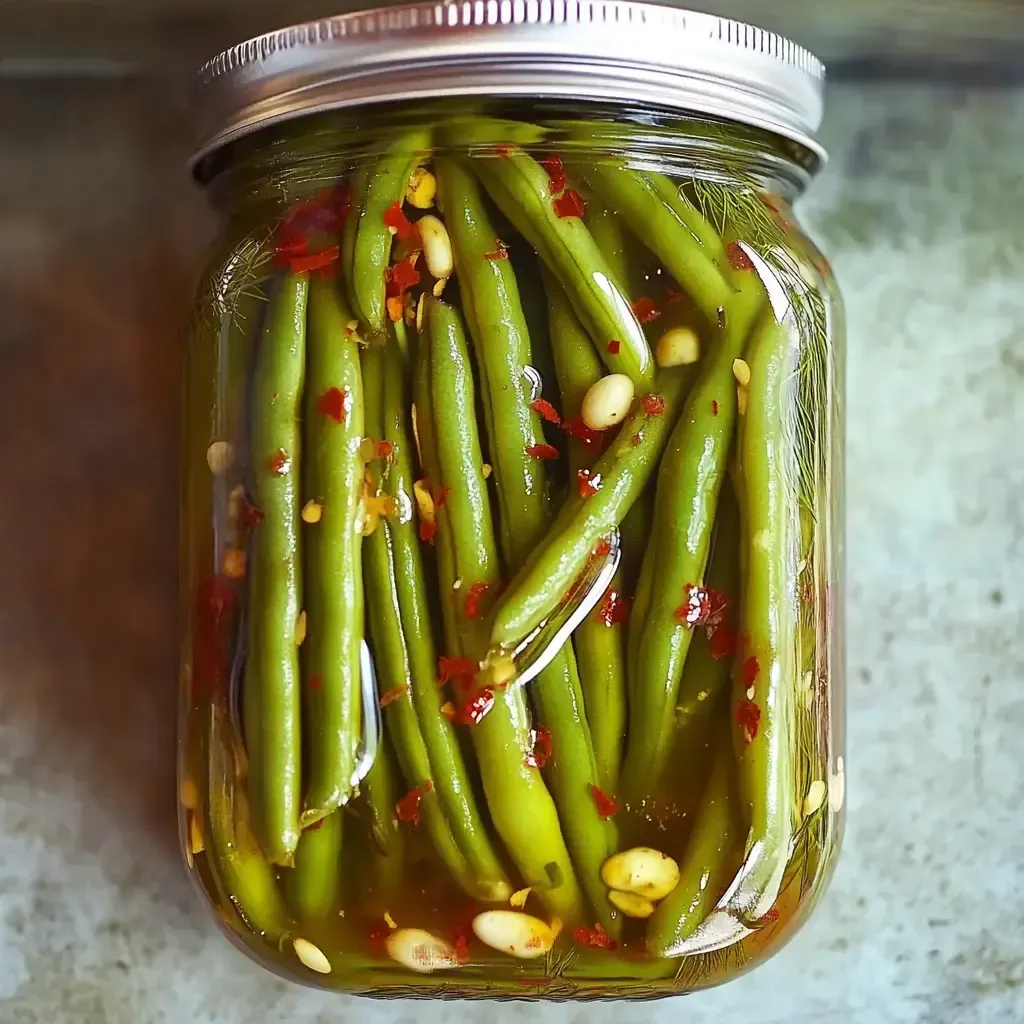
Picture this: crisp green beans standing tall in a jar, immersed in a tangy brine that’s been kissed with just the right amount of spice. Whether you’re jazzing up your Bloody Mary or elevating your snack game, these Spicy Dilly Beans are a surefire way to add a punch of excitement to your dishes. With each satisfying crunch, you’ll savor the garden-fresh goodness that’s been lovingly preserved in every bite.
Crafting your own batch of Spicy Dilly Beans is a breeze – simple ingredients, a dash of patience, and a lot of love are all you need. So grab those green beans, get your jars ready, and let’s embark on a flavorful journey that will have you savoring the taste of summer all year round.
Quick Benefits
- Preserves summer beans: A great way to enjoy the garden bounty all year round.
- Spicy kick: Red chile flakes add a flavorful kick that keeps you coming back for more.
- Crisp texture: The beans stay perfectly crisp, even after canning.
- Versatile use: Perfect for garnishing Bloody Marys, chopping for salads, or serving alongside sandwiches.
Why You’ll Love This Zesty Homemade Spicy Dilly Beans Recipe
- Incredible Flavor Combination: The mix of dill seed, garlic, and red chile flakes creates a burst of rich, savory, and spicy flavors that complement the green beans perfectly.
- Preserves Summer Bounty: A fantastic way to savor the freshness of summer green beans long after the season ends, providing a taste of summer all year round.
- Simple and Accessible: Requires only basic ingredients and equipment, making it an easy and approachable recipe for both beginner and experienced home cooks.
- Versatile Usage: Enjoy these spicy dilly beans as a snack, in cocktails like Bloody Marys, chopped in salads, or as a tasty accompaniment to sandwiches, showcasing their adaptability.
- Satisfying Crunch: Despite the canning process, the beans maintain a satisfying crunch, ensuring a delightful texture with each bite.
- Customizable Heat Level: Easily adjust the spiciness by varying the amount of red chile flakes, appealing to a wide range of taste preferences.
- Long Shelf Life: Properly canned jars can be stored for up to a year, allowing you to enjoy the delicious flavors and textures of these pickled beans for an extended period.
- Beautiful Presentation: The vibrant colors and enticing aroma of these pickled beans make for an attractive addition to your pantry, creating a visually appealing display when lined up in jars.
Ingredients for Zesty Homemade Spicy Dilly Beans
- 5 teaspoons red chile flakes.
- 5 teaspoons dill seed.
- 3 pounds green beans.
- 4 tablespoons pickling salt.
- 2 1/2 cups water.
- 2 1/2 cups white vinegar.
- 5 medium cloves garlic.
Pro Tips for Zesty Homemade Spicy Dilly Beans
For the perfect spicy dilly beans, be sure to select fresh and crisp green beans for the best results. Trim them to fit your jars and pack them tightly for a beautiful presentation. Experiment with the level of heat by adjusting the amount of red chile flakes – decrease for a milder flavor or add more for an extra kick.
When making your brine, ensure the vinegar, water, and pickling salt are boiled together to create a tangy and clear solution. Don’t be afraid to customize the recipe by adding in additional spices like mustard seeds or peppercorns to create unique flavor profiles. Remember, the longer you wait for the flavors to develop, the more delicious your dilly beans will be, so exercise patience and let them sit for at least a week before enjoying.
How to Make Zesty Homemade Spicy Dilly Beans
Step 1: Step 01
Set up a boiling water bath and sterilize 5 pint jars. Heat lids in a small saucepan.
Step 2: Step 02
Wash and trim beans to fit jars, cutting them in half if necessary.
Step 3: Step 03
In a saucepan, combine vinegar, water, and salt. Bring to a boil.
Step 4: Step 04
Fill jars with beans, leaving 1/2 inch of headspace. Place 1 garlic clove, 1 teaspoon dill seeds, and 1 teaspoon chile flakes in each jar.
Step 5: Step 05
Pour the hot brine over the beans, leaving a 1/2 inch headspace. Use a chopstick to remove any air bubbles.
Step 6: Step 06
After wiping rims, place lids and rings on jars and process in a hot water bath for 10 minutes.
📌 Pin for later!

Storage Tips
Once you have made a batch of spicy dilly beans, you can store them in two main ways depending on your preference. If you have made a smaller, quick batch, you can keep the jars in the refrigerator where they will remain good for approximately 3 weeks. However, if you have canned the dilly beans properly using the water bath method, you can store the sealed jars in your pantry for up to a year. Be sure to listen for the satisfying pop as the jars seal and cool after processing in boiling water.
When storing your spicy dilly beans, it’s important to keep them in a cool, dark place away from direct sunlight. This will help preserve the flavors and textures of the beans over time. Remember that the longer you allow the beans to sit, the more the flavors will develop and meld together, creating a more delicious end result. Feel free to experiment with different spice combinations such as mustard seeds or peppercorns to customize the flavor profile of your dilly beans. Whether you enjoy them as a garnish in cocktails or as a tasty snack, having a jar of these flavorful beans on hand will add a delicious kick to your meals.
Ingredient Substitutions
If you prefer a milder version of these spicy dilly beans, consider reducing the amount of red chile flakes used in the recipe. You can adjust the level of heat based on your personal preference, ensuring that the beans are still flavorful but less spicy.
For those looking to add a different twist to the traditional dilly bean recipe, experiment with alternative spices such as mustard seeds or peppercorns. These can provide a unique flavor profile while still complementing the dill, garlic, and vinegar base. Feel free to tailor the spice blend to suit your taste preferences and create a custom dilly bean variation that suits your palate.
Serving Suggestions
Serve these spicy dilly beans as a unique and flavorful addition to a charcuterie board. Pair them with sharp cheeses, cured meats, and a variety of crackers for a delightful snack or appetizer spread. The tangy brine and crunchy texture of the beans will complement the other savory elements on the board, providing a pop of heat and freshness.
For a fun twist on a classic dish, incorporate these spicy dilly beans into a loaded Bloody Mary bar. Set out an array of garnishes like celery sticks, olives, pickles, and of course, the dilly beans for guests to customize their drinks. The spicy kick from the chile flakes will elevate the flavor profile of the Bloody Mary, adding a zesty and satisfying crunch with each sip.
FAQs for Zesty Homemade Spicy Dilly Beans
Can I substitute the green beans with a different type of bean?
While green beans are traditionally used for dilly beans, you can experiment with other beans like wax beans or even asparagus spears for a different twist on the recipe.
How can I adjust the spiciness level of the dilly beans?
If you prefer milder beans, simply reduce the amount of red chile flakes in the recipe. You can also try adding other spices like mustard seeds or black peppercorns for a different flavor profile.
How long do the dilly beans need to sit before they are ready to eat?
It’s recommended to wait at least a week for the flavors to fully develop before enjoying the dilly beans. However, the longer you wait, the more intense the flavor will become, so feel free to let them sit for a few weeks for optimal taste.
Can I store the dilly beans in the refrigerator instead of canning them?
If you’re making a small batch for immediate consumption, you can store the dilly beans in the refrigerator where they will stay good for about 3 weeks. For long-term storage, it’s best to properly can the jars to ensure they stay preserved for up to a year in your pantry.
Conclusion
I hope you enjoy making and savoring these flavorful Spicy Dilly Beans as much as I do. Preserving the taste of summer in a jar is such a rewarding experience, and these beans are a delightful addition to any meal or snack. The combination of dill, garlic, and just the right amount of heat from the red chile flakes truly makes these pickled beans stand out.
Whether you’re a seasoned home canner or new to the world of pickling, these Spicy Dilly Beans are a fantastic recipe to try. Experiment with different spice levels and additional ingredients to make them your own. The joy of opening a jar of homemade pickled beans months later and enjoying that fresh, crunchy texture is truly unbeatable. So go ahead, gather your ingredients, and let’s get pickling those Spicy Dilly Beans!
📌 Pin for later!
Zesty Homemade Spicy Dilly Beans
Preserve summer’s bounty with Spicy Dilly Beans; crisp green beans, garlic, dill, and a kick of chile flakes make the perfect addition to any meal.
Prep Time10 Minutes
Cook Time35 Minutes
Total Time45 Minutes
CuisineAmerican
Skill LevelIntermediate
Servings48 Servings (5 pints)
Ingredients
- 5 teaspoons red chile flakes.
- 5 teaspoons dill seed.
- 3 pounds green beans.
- 4 tablespoons pickling salt.
- 2 1/2 cups water.
- 2 1/2 cups white vinegar.
- 5 medium cloves garlic.
Instructions
-
Step 01: Set up a boiling water bath and sterilize 5 pint jars. Heat lids in a small saucepan.
-
Step 02: Wash and trim beans to fit jars, cutting them in half if necessary.
-
Step 03: In a saucepan, combine vinegar, water, and salt. Bring to a boil.
-
Step 04: Fill jars with beans, leaving 1/2 inch of headspace. Place 1 garlic clove, 1 teaspoon dill seeds, and 1 teaspoon chile flakes in each jar.
-
Step 05: Pour the hot brine over the beans, leaving a 1/2 inch headspace. Use a chopstick to remove any air bubbles.
-
Step 06: After wiping rims, place lids and rings on jars and process in a hot water bath for 10 minutes.