Follow Me On Social Media!
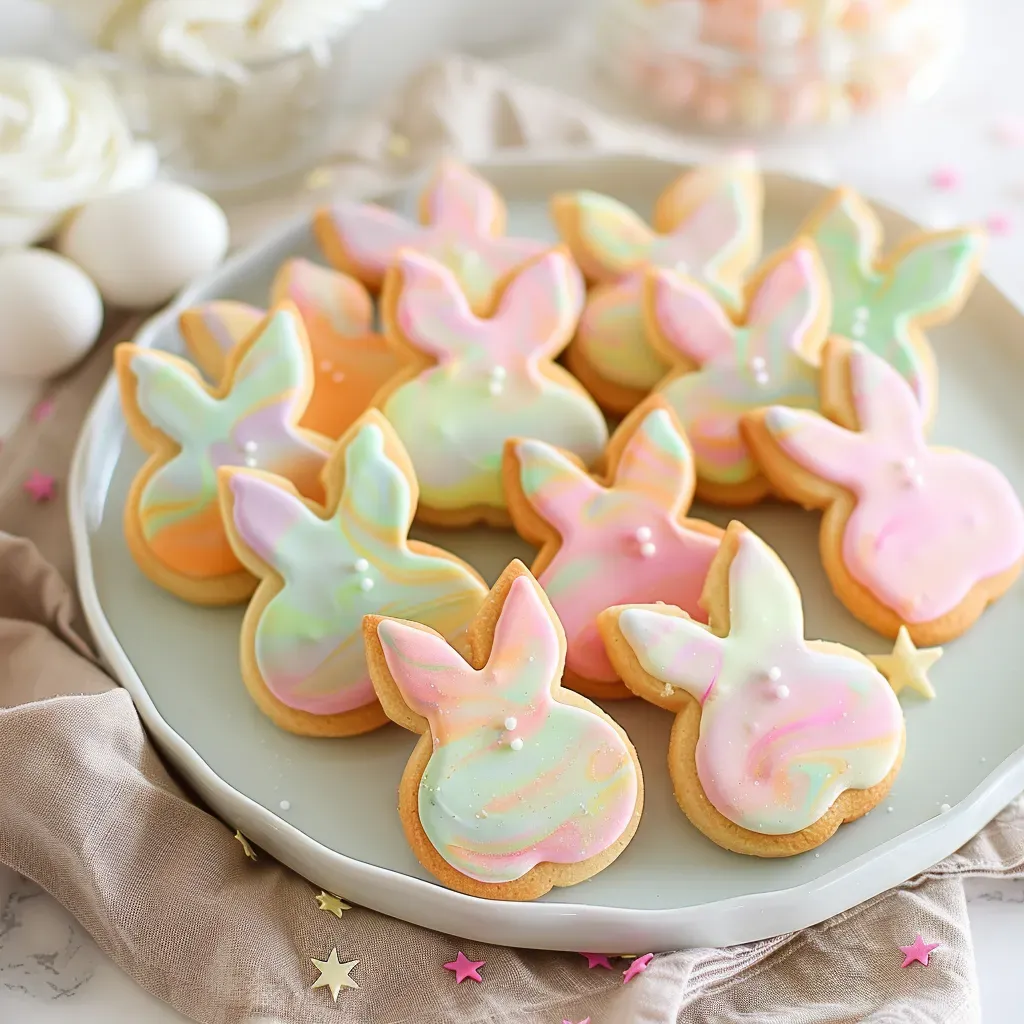
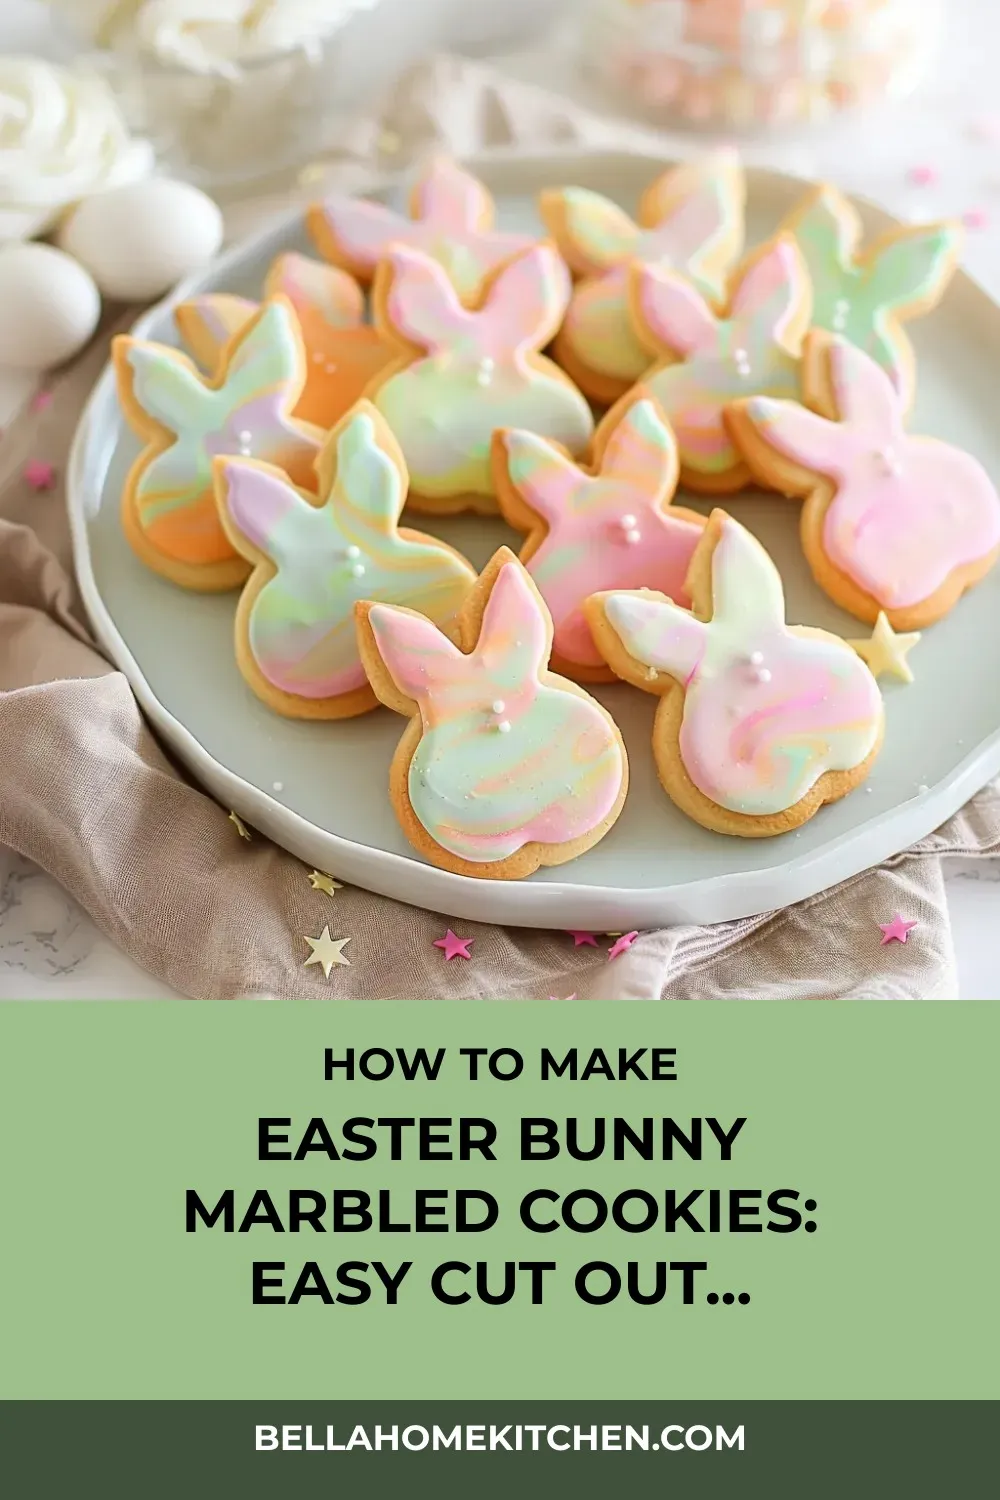
Welcome to a delightful Easter baking adventure with our Marbled Easter Bunny Cut Out Cookies! These whimsical treats are not just your ordinary sugar cookies; they are a joyful celebration of springtime creativity. The marbling technique used to create these adorable bunny-shaped cookies results in a unique masterpiece with every batch. Perfect for adding a touch of magic to your Easter festivities, these cookies are as delightful to look at as they are delicious to eat.
The key to achieving the perfect swirls in our Marbled Easter Bunny Cut Out Cookies lies in the gentle handling of the dough. As you mix and marble the dough, each bunny cookie becomes a canvas for vibrant spring colors, making them a standout addition to your holiday dessert table. Whether you’re baking with little helpers or simply indulging in some solo kitchen therapy, these cookies are sure to bring a smile to your face.
So, roll up your sleeves, gather your ingredients, and let’s embark on a baking journey filled with sweetness, creativity, and a sprinkle of Easter magic. These Marbled Easter Bunny Cut Out Cookies are not just treats; they are edible works of art that capture the essence of the season. Dive in, embrace the marbling process, and let your inner artist shine as you create these charming and delicious Easter bunny cookies.
Quick Benefits
- Creates one-of-a-kind patterns in every cookie through marbling technique
- Dough holds its shape perfectly while baking
- Less sweet than typical sugar cookies, perfect for decorating
- Freezes beautifully for make-ahead holiday prep
Why You’ll Love This Easter Bunny Marbled Cookies: Easy Cut Out Recipe Recipe
- The marbling technique creates one-of-a-kind patterns in every cookie, making them visually stunning and unique
- The dough holds its shape perfectly while baking, ensuring your cookies come out in perfect bunny shapes
- These cookies are less sweet than typical sugar cookies, making them a versatile canvas for decorating with icing
- Kids love helping with the marbling process, making it a fun and interactive baking activity for the whole family
- The cookies freeze beautifully for make-ahead holiday prep, allowing you to enjoy them at any time
- The recipe provides helpful tips on temperature control, dough handling, and baking techniques for successful results
- The cookies are not only delicious but also a delightful way to celebrate the spring season and Easter with their playful colors and flavors.
Ingredients for Easter Bunny Marbled Cookies: Easy Cut Out Recipe
Main Ingredients
- ½ teaspoon sea salt
- 4 cups all-purpose flour
- 2 eggs
- ⅓ cup cornstarch
- 1½ teaspoons vanilla extract
- 1 cup sugar
- 1 cup butter, softened
- ¼ teaspoon nutmeg (optional)
Pro Tips for Easter Bunny Marbled Cookies: Easy Cut Out Recipe
For perfect marbled Easter bunny cut out cookies, remember to handle the dough gently while adding and swirling colors. Patience is key to achieving beautiful swirls without blending colors too much. Keeping the dough cool throughout the process helps maintain distinct marbling patterns, so chill it if it becomes too soft at any point.
To ensure your cookies maintain their cute bunny shapes, work with cool dough, avoid twisting the cutter when cutting shapes, rotate baking sheets halfway through baking, and allow the cookies to cool on the sheets for 5 minutes before transferring them. Following these pro tips will help you create delightful and visually stunning treats that are as fun to make as they are to eat.
How to Make Easter Bunny Marbled Cookies: Easy Cut Out Recipe
Step 1: Step 01
Preheat the oven to 375°F.
Step 2: Step 02
In a stand mixer with a paddle attachment, cream together butter, sugar, and salt.
Step 3: Step 03
Combine the eggs and vanilla extract.
Step 4: Step 04
Combine flour, cornstarch, and nutmeg, mixing on low speed until fully combined. Refrigerate for 30 minutes if desired.
Step 5: Step 05
On a lightly floured surface, roll out the dough to a thickness of ¼ to ½ inch. Use cookie cutters to cut out desired shapes.
Step 6: Step 06
Bake for 8-10 minutes or until edges are lightly browned; avoid overbaking.
📌 Pin for later!
Storage Tips
To store the finished marbled Easter bunny cut out cookies, it’s essential to keep them fresh and maintain their beautiful appearance. Once the cookies have completely cooled after baking and decorating, store them in an airtight container at room temperature. The cookies will stay fresh for up to two weeks when stored this way, making them a delightful treat to enjoy over time.
For longer storage, these cookies can be frozen for several months. To freeze the marbled Easter bunny cookies, place them in a single layer in an airtight container or freezer-safe bag, separating layers with parchment paper to prevent sticking. When ready to enjoy, simply thaw the cookies at room temperature or in the refrigerator before serving. This convenient storage option allows you to prepare these festive treats ahead of time for any special occasion.
Ingredient Substitutions
For potential ingredient substitutions in this Marbled Easter Bunny Cut Out Cookies recipe, you can try using margarine instead of butter for a dairy-free option. Make sure the margarine is suitable for baking to maintain the desired texture. Additionally, if you prefer a different sweetener, you could experiment with using a natural sweetener like coconut sugar or a sugar substitute suitable for baking.
If you want to enhance the flavor profile of these cookies, you can substitute the vanilla extract with almond extract or lemon zest for a different twist. These alternatives can add a unique flavor dimension to the cookies while still keeping them delicious and festive. Remember to adjust the quantities according to your taste preferences.
Lastly, if you don’t have cornstarch on hand, you can substitute it with an equal amount of tapioca starch or arrowroot powder. These alternatives can help maintain the structure of the cookies and achieve the desired texture. Be mindful of any potential differences in absorption rates and adjust the dough consistency accordingly.
Serving Suggestions
For a whimsical Easter dessert spread, serve your Marbled Easter Bunny Cut Out Cookies alongside colorful pastel candies, fresh edible flowers, and mini chocolate eggs. Arrange the cookies on a tiered cake stand to showcase their unique marbled patterns and encourage guests to mix and match different colors for a fun and festive treat. To elevate the presentation, sprinkle a light dusting of edible glitter over the cookies for a touch of sparkle that will delight both kids and adults.
For a creative twist, consider using the Marbled Easter Bunny Cut Out Cookies as edible decorations for an Easter-themed cake. Simply place the cookies around the perimeter of a frosted cake, alternating colors and orientations to create a charming bunny border. Finish off the cake with a sprinkle of shredded coconut for a fluffy “nest” effect, and adorn the top with a few extra cookies as a whimsical finishing touch. This playful and eye-catching dessert is sure to be the centerpiece of your Easter celebration.
FAQs for Easter Bunny Marbled Cookies: Easy Cut Out Recipe
How far in advance can I make the dough for these marbled Easter bunny cookies?
You can make the dough and color it up to 3 days ahead. Just wrap it well and store it in the refrigerator until you’re ready to use it.
What should I do if my cookie dough becomes too soft to work with during the marbling process?
If your dough becomes too soft at any point, simply return it to the refrigerator for a quick chill. Keeping the dough cool throughout the process helps maintain distinct marbling patterns.
Can I freeze the baked marbled Easter bunny cookies?
Yes, the baked cookies freeze beautifully for up to 3 months. Just make sure to wrap them well in an airtight container or freezer-safe bag to maintain their freshness.
How can I prevent the colors from blending too much in the dough during the marbling process?
If you notice that the colors are blending too much, chill the dough immediately. Chilling the dough helps set the colors in place and prevents them from blending together too much.
Conclusion
As you embark on creating your own batch of Marbled Easter Bunny Cut Out Cookies, remember that baking is an art form that brings us joy and connects us to traditions both old and new. The process of marbling these cookies is a delightful adventure, allowing you to unleash your creativity and share the magic of Easter with those around you. By following the tips and tricks shared in this recipe, you’ll be well on your way to crafting beautiful, whimsical cookies that will surely bring smiles to everyone who enjoys them.
Whether you’re making these cookies for your family, friends, or yourself, the love and care you put into each swirl of color will undoubtedly shine through in the final product. Embrace the unique patterns that emerge from the marbling technique and relish in the joy of creating edible works of art. So, gather your ingredients, set aside some time to bake, and let the magic of Marbled Easter Bunny Cut Out Cookies brighten your holiday season. Happy baking!
📌 Pin for later!
Easter Bunny Marbled Cookies: Easy Cut Out Recipe
“Transform ordinary sugar cookies into magical marbled Easter bunny masterpieces with vibrant swirls, creating a delightful treat perfect for celebrating the season.”
Prep Time~ undefined
Cook Time10 Minutes
Total Time10 Minutes
CuisineAmerican
Skill LevelIntermediate
Servings1 Servings
Ingredients
Main Ingredients
- ½ teaspoon sea salt
- 4 cups all-purpose flour
- 2 eggs
- ⅓ cup cornstarch
- 1½ teaspoons vanilla extract
- 1 cup sugar
- 1 cup butter, softened
- ¼ teaspoon nutmeg (optional)
Instructions
-
Step 01: Preheat the oven to 375°F.
-
Step 02: In a stand mixer with a paddle attachment, cream together butter, sugar, and salt.
-
Step 03: Combine the eggs and vanilla extract.
-
Step 04: Combine flour, cornstarch, and nutmeg, mixing on low speed until fully combined. Refrigerate for 30 minutes if desired.
-
Step 05: On a lightly floured surface, roll out the dough to a thickness of ¼ to ½ inch. Use cookie cutters to cut out desired shapes.
-
Step 06: Bake for 8-10 minutes or until edges are lightly browned; avoid overbaking.