Classic Peanut Butter Blossoms Recipe
Introduction
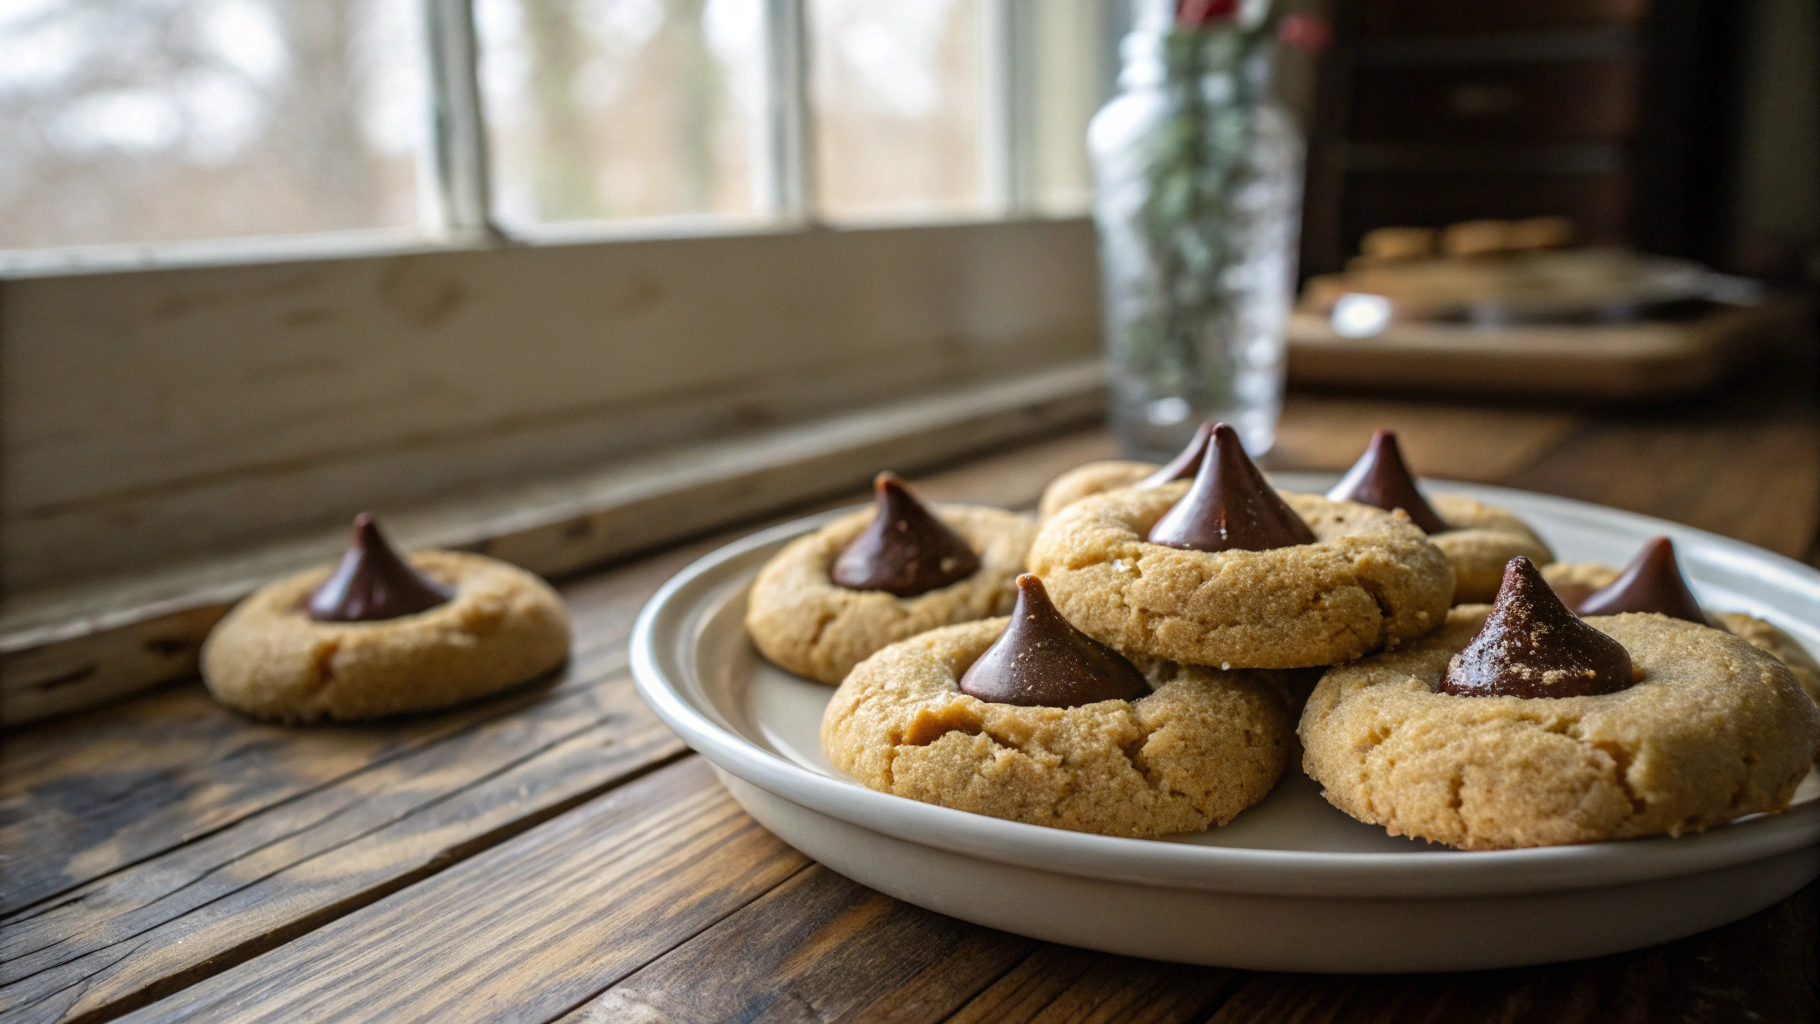
Indulge in the delightful flavors of a timeless favorite with this Classic Peanut Butter Blossoms Recipe. These cookies perfectly blend the rich creaminess of peanut butter with a sweet surprise of a chocolate kiss, creating a treat that’s adored by all. Whether it’s a festive occasion or a simple craving for something sweet, these peanut butter blossoms are sure to bring joy to your taste buds.
Why choose this Classic Peanut Butter Blossoms Recipe?
Experience the perfect balance of flavors and textures in this classic recipe. The soft and chewy peanut butter cookies paired with a Hershey’s Kiss create a mouthwatering combination that’s hard to resist. These cookies not only taste delicious but also offer a visual appeal that makes them stand out on any dessert table. Elevate your baking game with this tried-and-true recipe that never fails to impress.
Ingredients for Classic Peanut Butter Blossoms Recipe
- ½ cup butter (softened)
- ½ cup peanut butter
- ½ cup granulated sugar
- ½ cup packed brown sugar
- 1 large egg
- 1 teaspoon vanilla extract
- 1 ½ cups all-purpose flour
- 1 teaspoon baking soda
- ¼ teaspoon salt
- About 30 Hershey’s Kisses (unwrapped)
Preparation Steps for Classic Peanut Butter Blossoms Recipe
Step 1: Preheat the Oven
Begin by preheating your oven to 375°F (190°C) and prepare two baking sheets lined with parchment paper or silicone baking mats to ensure the cookies don’t stick during baking.
Step 2: Cream the Butter and Sugars
In a large bowl, cream together the softened butter, peanut butter, granulated sugar, and brown sugar until the mixture is light and fluffy. Properly creaming these ingredients is crucial for achieving the desired soft and chewy texture of the cookies.
Step 3: Add Egg and Vanilla
Once the butter mixture is smooth, add in the egg and vanilla extract. Beat the mixture until everything is fully combined. The egg helps bind the ingredients together, while the vanilla extract enhances the overall flavor of the cookies.
Step 4: Combine Dry Ingredients
In a separate bowl, whisk together the all-purpose flour, baking soda, and salt. Gradually add this dry mixture to the wet ingredients, stirring until a smooth cookie dough forms.
Step 5: Shape the Dough
Take small portions of the dough and roll them into balls about 1 inch in size. Place the dough balls on the prepared baking sheets, leaving enough space between each ball for spreading during baking.
Health Benefits of Classic Peanut Butter Blossoms Recipe
Peanut butter blossoms, despite being a delicious treat, offer some surprising health benefits. Peanut butter is a good source of protein, healthy fats, and essential nutrients like vitamin E, magnesium, and potassium. It can help in maintaining a healthy heart, reducing the risk of diabetes, and even aiding in weight loss when consumed in moderation. Additionally, the dark chocolate in the Hershey’s Kisses provides antioxidants and may boost brain function. Enjoying these cookies in moderation can be a tasty way to sneak in some nutrients!
Origin and History of the Classic Peanut Butter Blossoms Recipe
The classic Peanut Butter Blossoms recipe is a nostalgic creation that dates back to the early 1950s. It is believed to have originated in American kitchens, becoming a popular choice for holiday baking. The combination of peanut butter and chocolate was a stroke of culinary genius that has stood the test of time. This recipe has been passed down through generations, bringing joy to families and friends alike. Its simplicity and deliciousness have made it a beloved classic in the world of baking.
Delicious Variations Around Classic Peanut Butter Blossoms Recipe
While the classic Peanut Butter Blossoms recipe is a timeless favorite, there are several delightful variations you can explore to add a twist to this traditional treat. From incorporating different types of chocolate to experimenting with nut butter alternatives, the possibilities are endless. You can also try adding spices like cinnamon or nutmeg for a unique flavor profile, or even top the cookies with chopped nuts for an added crunch. Get creative in the kitchen and tailor these cookies to suit your taste preferences!
Chef’s Tips for Perfecting Your Classic Peanut Butter Blossoms Recipe
For flawless Peanut Butter Blossoms every time, follow these expert tips:
- Ensure your butter is softened but not melted to achieve the perfect cookie texture.
- Use creamy peanut butter for a smooth consistency, or opt for crunchy for added texture.
- Cream the butter and sugars well to create a light and fluffy base for your cookies.
- Do not overmix the dough once the dry ingredients are added to prevent a tough cookie texture.
- Place the Hershey’s Kisses on the cookies immediately after they come out of the oven to ensure they stick well.
- Store the cookies in an airtight container to maintain their freshness and prevent them from becoming stale.
Mistakes to Avoid When Preparing Classic Peanut Butter Blossoms Recipe
When making Classic Peanut Butter Blossoms, there are a few common mistakes to watch out for to ensure your cookies turn out perfectly. One mistake to avoid is overbaking the cookies, as this can result in a dry and crumbly texture. It’s essential to follow the recommended baking time closely to achieve the ideal soft and chewy consistency. Another mistake is using cold ingredients, especially butter. Room temperature butter blends more easily with other ingredients, creating a smoother dough for the cookies. Lastly, make sure not to skip chilling the dough before baking. Chilling helps the cookies maintain their shape and prevents excessive spreading during baking.
Ingredient Alternatives for Classic Peanut Butter Blossoms Recipe
While the classic recipe for Peanut Butter Blossoms is delicious on its own, there are some ingredient alternatives you can explore to add a unique twist to this traditional treat. Consider using almond butter instead of peanut butter for a nutty flavor variation. You can also experiment with different types of chocolate candies in the center, such as dark chocolate kisses or flavored chocolate pieces. For a healthier option, try incorporating whole wheat flour or almond flour into the dough mixture. These ingredient alternatives can provide a fresh take on the classic recipe while still preserving the essence of Peanut Butter Blossoms.
Tips and Tricks to Perfect Your Classic Peanut Butter Blossoms Recipe
To elevate your Classic Peanut Butter Blossoms to perfection, consider the following tips and tricks. When shaping the dough into balls, aim for consistency in size to ensure even baking. Pressing the cookies slightly flat before baking helps them spread evenly and ensures a uniform shape. For an extra touch of sweetness, sprinkle a pinch of sea salt on top of each cookie before baking to enhance the flavor contrast. Additionally, try experimenting with different types of nut butter for a unique flavor profile. Finally, storing the baked cookies in an airtight container with a slice of bread helps maintain their softness and freshness for an extended period.
Side Dish Suggestions for Classic Peanut Butter Blossoms Recipe
While Classic Peanut Butter Blossoms are delightful on their own, pairing them with complementary side dishes can create a well-rounded dessert experience. Consider serving these cookies with a scoop of vanilla ice cream for a classic combination of warm and cold textures. Alternatively, you can accompany Peanut Butter Blossoms with a glass of cold milk or a hot cup of coffee to enhance the overall enjoyment of this sweet treat. For a more decadent option, try sandwiching a scoop of your favorite ice cream between two Peanut Butter Blossoms to create a delicious ice cream sandwich. These side dish suggestions can elevate the presentation and flavor profile of Classic Peanut Butter Blossoms, making them a standout dessert choice.
FAQ about the recipe Classic Peanut Butter Blossoms Recipe
How to store the recipe Classic Peanut Butter Blossoms Recipe after cooking?
To store the Classic Peanut Butter Blossoms Recipe after baking, allow them to cool completely. Once cooled, place them in an airtight container with layers separated by parchment paper. Store at room temperature for up to 1 week or freeze for longer shelf life. Freezing is ideal for storing them for up to 3 months without compromising their taste and texture.
Can the recipe Classic Peanut Butter Blossoms Recipe be prepared in advance?
Yes, you can prepare the Classic Peanut Butter Blossoms Recipe in advance. You can make the dough ahead of time and refrigerate it for up to 48 hours. When ready to bake, simply roll the dough into balls, coat them in sugar, and bake as directed. This make-ahead option is convenient for busy schedules or planning for events ahead of time.
What ingredients can be substituted in the recipe Classic Peanut Butter Blossoms Recipe?
If you need to substitute ingredients in the Classic Peanut Butter Blossoms Recipe, you can replace peanut butter with almond butter, cashew butter, or sunflower seed butter for different flavor profiles. For a dairy-free version, use a dairy-free butter alternative and ensure the chocolate kisses are also dairy-free. Additionally, you can customize the cookies by using gluten-free flour blends or sugar alternatives like stevia or monk fruit sweeteners.
How to adapt the recipe Classic Peanut Butter Blossoms Recipe for a vegetarian version?
To adapt the Classic Peanut Butter Blossoms Recipe for a vegetarian version, ensure you use ingredients that are free from any animal-derived products. Stick to plant-based options for butter, egg, and other components. Check the labels on chocolate kisses to ensure they are vegetarian-friendly. By making these simple swaps, you can enjoy this classic cookie recipe in a vegetarian-friendly way.
Is the recipe Classic Peanut Butter Blossoms Recipe suitable for children?
Yes, the Classic Peanut Butter Blossoms Recipe is a kid-friendly treat that children are sure to love. These cookies are soft, chewy, and have a delightful chocolate surprise in the center, making them appealing to kids. You can involve children in the baking process by letting them help with rolling the dough into balls and placing the chocolate kisses. They are perfect for school lunches, bake sales, or as a special homemade treat for your little ones.
Conclusion about the recipe Classic Peanut Butter Blossoms Recipe
With its classic combination of peanut butter and chocolate, the Classic Peanut Butter Blossoms Recipe is a timeless favorite for all ages. Whether enjoyed during the holiday season or as a sweet indulgence throughout the year, these cookies never fail to delight. By following the step-by-step instructions and exploring different variations and substitutions, you can customize this recipe to suit your preferences. Treat yourself and your loved ones to these delectable cookies and savor the perfect blend of flavors in each delightful bite.
📌 Keep This Recipe Handy & Discover More Tasty Ideas!
Enjoyed this recipe? Don’t let it slip away! Save it now on Pinterest so it’s always just a click away. Pinning it also helps others find simple, delicious meal ideas!
💡 Whether you’re organizing your weekly meal plan or whipping up something special for guests, having your go-to recipes saved makes life in the kitchen so much easier. Use Pinterest to collect your favorites, explore new versions of classic dishes, and revisit your top meals anytime.
📲 Don’t forget to follow us on Pinterest for a daily dose of inspiration — from cozy family dinners and quick lunches to seasonal desserts and healthy snacks. We update regularly with recipes designed to fit your lifestyle and taste.
📖 Craving more? Head over to our full recipe library to browse a wide variety of easy and flavorful dishes. No matter your skill level, you’ll find recipes that are simple to make and packed with flavor.
✨ Bookmark your favorites and swing by often — there’s always something fresh and delicious waiting for you!