Chocolate Thumbprint Cookies
Introduction
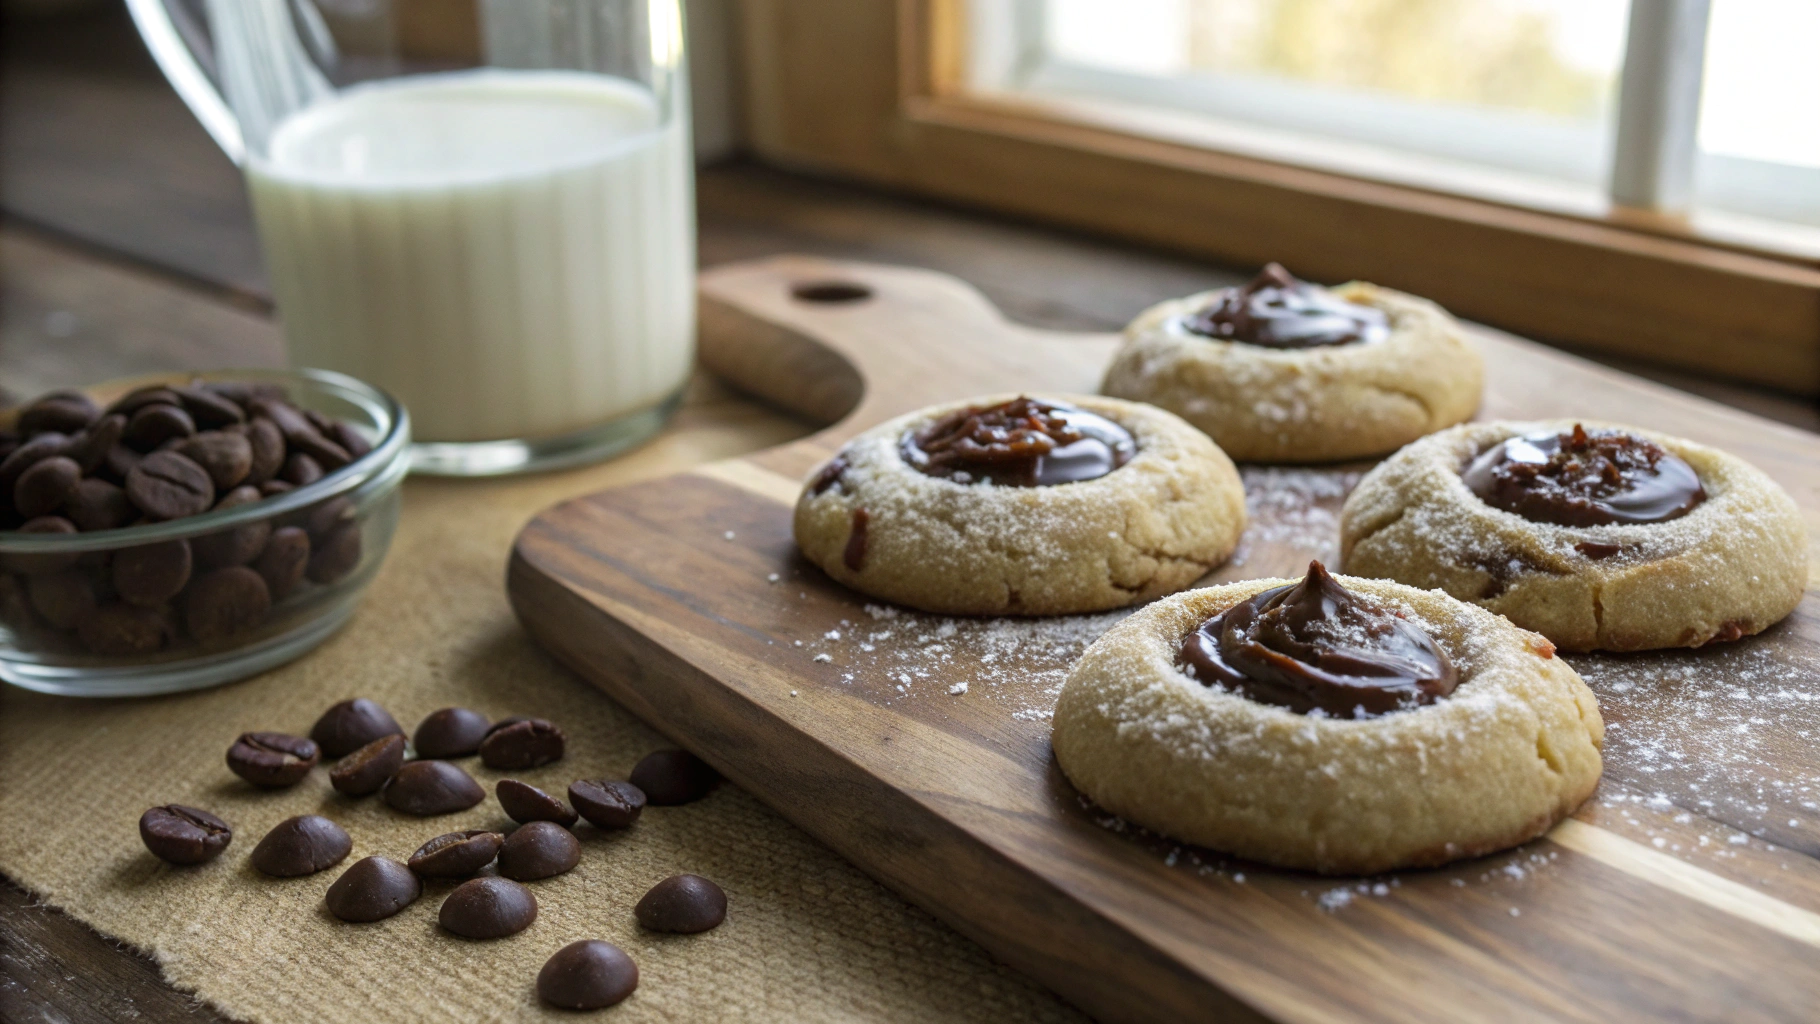
Indulge in the decadent world of chocolate with these irresistible Chocolate Thumbprint Cookies. Perfectly rich and satisfying, these cookies are a delightful treat for any occasion, be it a festive gathering or a cozy afternoon snack.
Why choose this Chocolate Thumbprint Cookies recipe?
Embark on a culinary adventure with these Chocolate Thumbprint Cookies that offer a perfect balance of flavors and textures. Whether you’re a novice baker or a seasoned pro, this recipe guarantees a delightful baking experience and mouthwatering results that will impress all chocolate enthusiasts.
Ingredients for Chocolate Thumbprint Cookies
- All-purpose flour: 2 cups
- Unsweetened cocoa powder: 1/2 cup
- Unsalted butter, softened: 1 cup
- Granulated sugar: 3/4 cup
- Egg yolk: 1 large
- Vanilla extract: 1 tsp
- Salt: 1/4 tsp
- Chocolate chips (for filling): 1/2 cup
- Heavy cream (for ganache filling): 1/4 cup
- Optional toppings: Crushed nuts, sprinkles, shredded coconut, powdered sugar
Preparation Steps for Chocolate Thumbprint Cookies
Step 1: Prepare the Dough
To kick off the baking process, cream together the softened butter and sugar until light and fluffy, typically taking around 2–3 minutes. Incorporate the egg yolk and vanilla extract, ensuring a well-mixed consistency. In a separate bowl, combine the flour, cocoa powder, and salt, gradually adding this dry mixture to the wet ingredients until a soft dough is formed.
Step 2: Chill the Dough
Wrap the dough in plastic wrap and allow it to chill in the refrigerator for at least 30 minutes. Chilling the dough helps it firm up, making it easier to handle and preventing excessive spreading during baking.
Step 3: Shape the Cookies
Preheat the oven to 350°F (175°C) and line a baking sheet with parchment paper. Form the dough into 1-inch balls, rolling them smoothly between your palms. Place the balls on the baking sheet, ensuring some space between them to allow for spreading while baking.
Step 4: Make the Thumbprint
Using your thumb or a rounded teaspoon, gently create an indentation in the center of each dough ball. Be gentle in this step to form a well rather than a hole in the cookies.
Step 5: Bake the Cookies
Bake the cookies in the preheated oven for 10–12 minutes until they are set but still soft. If the indentations rise during baking, gently press them again with the back of a spoon immediately after removing from the oven.
Health Benefits of Chocolate Thumbprint Cookies
While chocolate thumbprint cookies may not be considered a health food, they do offer some surprising benefits when enjoyed in moderation. Dark chocolate, a key ingredient in these cookies, is rich in antioxidants that can help reduce inflammation and improve heart health. Additionally, the act of baking and decorating these cookies can be a therapeutic and stress-relieving activity, promoting mental well-being.
Origin and History of the Chocolate Thumbprint Cookies Recipe
The exact origin of chocolate thumbprint cookies is unclear, but they are believed to have originated in the United States as a variation of traditional thumbprint cookies. The concept of pressing a small indentation into cookie dough and filling it with jam or chocolate likely evolved over time to create the decadent chocolate thumbprint cookies we enjoy today.
Delicious Variations Around Chocolate Thumbprint Cookies
There are endless possibilities for customizing chocolate thumbprint cookies to suit your taste preferences. Consider filling the thumbprints with salted caramel, mint chocolate ganache, or even a dollop of creamy peanut butter. For a festive touch, sprinkle crushed peppermint candies on top or drizzle with white chocolate for an elegant finish.
Chef’s Tips for Perfecting Your Chocolate Thumbprint Cookies
- For a perfectly round thumbprint, use the back of a rounded teaspoon to create an indentation in the cookie dough.
- To prevent the cookie dough from sticking to your hands when rolling into balls, lightly dust them with cocoa powder or powdered sugar.
- Experiment with different textures by adding chopped nuts or shredded coconut to the cookie dough for a delightful crunch.
- Allow the cookies to cool completely before adding fillings or toppings to ensure they set properly and maintain their shape.
Ingredient Alternatives for Chocolate Thumbprint Cookies
Looking to switch things up with your chocolate thumbprint cookies? Here are some ingredient alternatives to consider:
- Butter: Try using coconut oil as a dairy-free alternative for a slightly different flavor profile.
- Sweeteners: Experiment with honey or agave syrup for a natural sweetener option.
- Flour: Almond flour or oat flour can be used for a gluten-free twist.
- Cocoa Powder: For a unique taste, consider using carob powder as a substitute.
- Filling: Instead of the traditional chocolate filling, try using almond butter or fruit preserves for a fruity touch.
Tips and Tricks to Perfect Your Chocolate Thumbprint Cookies
Here are some expert tips to take your chocolate thumbprint cookies to the next level:
- Ensure your butter is at the right temperature for optimal creaming with sugar.
- Chill the dough thoroughly to prevent spreading during baking.
- Use a melon baller for consistent cookie sizes.
- Don’t overfill the thumbprint indentation to prevent overflowing during baking.
- Experiment with different fillings and toppings for a variety of flavors and textures.
Side Dish Suggestions for Chocolate Thumbprint Cookies
Pair your decadent chocolate thumbprint cookies with these delightful side dishes for a complete dessert experience:
- Vanilla bean ice cream for a classic and creamy accompaniment.
- Warm salted caramel sauce drizzled over the cookies for an indulgent treat.
- Fresh berries like raspberries or strawberries for a refreshing contrast to the rich chocolate.
- Espresso or coffee for a delightful after-dinner pairing.
FAQ about the recipe Chocolate Thumbprint Cookies
How to store the recipe Chocolate Thumbprint Cookies after cooking?
To store the Chocolate Thumbprint Cookies, ensure they are completely cooled before placing them in an airtight container. Layer the cookies between sheets of parchment or wax paper to prevent sticking. They can be stored at room temperature for up to 3 days or in the refrigerator for up to a week. For longer storage, freeze the cookies in a single layer before transferring them to a freezer-safe container.
Can the recipe Chocolate Thumbprint Cookies be prepared in advance?
Yes, you can prepare the Chocolate Thumbprint Cookies in advance. After shaping the dough balls, you can refrigerate them for up to 24 hours before baking. You can also freeze the unbaked cookies on a baking sheet until firm, then transfer them to a freezer-safe container for up to 3 months. When ready to bake, simply place the frozen dough balls on a baking sheet and add a couple of extra minutes to the baking time.
What ingredients can be substituted in the recipe Chocolate Thumbprint Cookies?
If you need to make substitutions in the Chocolate Thumbprint Cookies recipe, there are several options. You can use margarine or coconut oil instead of butter for a dairy-free version. Substitute coconut sugar, honey, or maple syrup for granulated sugar. Gluten-free flour blends can replace all-purpose flour, and carob powder can stand in for cocoa powder. Get creative with fillings like fruit preserves, nut butter, or even marshmallow fluff for a unique twist.
How to adapt the recipe Chocolate Thumbprint Cookies for a vegetarian version?
Adapting the Chocolate Thumbprint Cookies for a vegetarian version is simple. Ensure you use vegetarian-friendly ingredients such as plant-based butter, dairy-free chocolate chips, and non-dairy cream for the ganache filling. Check the labels on your ingredients to ensure they do not contain any animal-derived products. By making these easy swaps, you can enjoy delicious vegetarian Chocolate Thumbprint Cookies without compromising on taste or texture.
Is the recipe Chocolate Thumbprint Cookies suitable for children?
Yes, the Chocolate Thumbprint Cookies are a great baking project to involve children in. Kids can have fun rolling the dough into balls and creating the thumbprint indentations. You can set up a decorating station with various toppings like colorful sprinkles, mini chocolate chips, or crushed nuts for them to customize their cookies. Just ensure adult supervision when using the oven and handling hot trays. These cookies make for a delightful treat that kids will enjoy making and eating!
Conclusion about the recipe Chocolate Thumbprint Cookies
Bringing together the richness of chocolate and the joy of baking, these Chocolate Thumbprint Cookies are a delightful treat for any occasion. Whether you’re a seasoned baker looking for a new recipe to add to your repertoire or a beginner eager to impress with homemade goodies, these cookies offer versatility and deliciousness in every bite. From the moment you shape the dough to the final touch of filling, these cookies will spark creativity and satisfy sweet cravings. Share them with loved ones, gift them as a token of appreciation, or simply indulge in their chocolaty goodness—it’s a recipe that never fails to please!
📌 Keep This Recipe Handy & Discover More Tasty Ideas!
Enjoyed this recipe? Don’t let it slip away! Save it now on Pinterest so it’s always just a click away. Pinning it also helps others find simple, delicious meal ideas!
💡 Whether you’re organizing your weekly meal plan or whipping up something special for guests, having your go-to recipes saved makes life in the kitchen so much easier. Use Pinterest to collect your favorites, explore new versions of classic dishes, and revisit your top meals anytime.
📲 Don’t forget to follow us on Pinterest for a daily dose of inspiration — from cozy family dinners and quick lunches to seasonal desserts and healthy snacks. We update regularly with recipes designed to fit your lifestyle and taste.
📖 Craving more? Head over to our full recipe library to browse a wide variety of easy and flavorful dishes. No matter your skill level, you’ll find recipes that are simple to make and packed with flavor.
✨ Bookmark your favorites and swing by often — there’s always something fresh and delicious waiting for you!